The following steps will guide you at setting up your Caorda hosted email on your iOS / Apple device using the IMAP configuration method.
This guide was created using iOS 18, newer or older devices may not show the same windows. Feel free to reach out to Caorda Support for any help.
If you are currently on iOS 16 please refer to this guide.
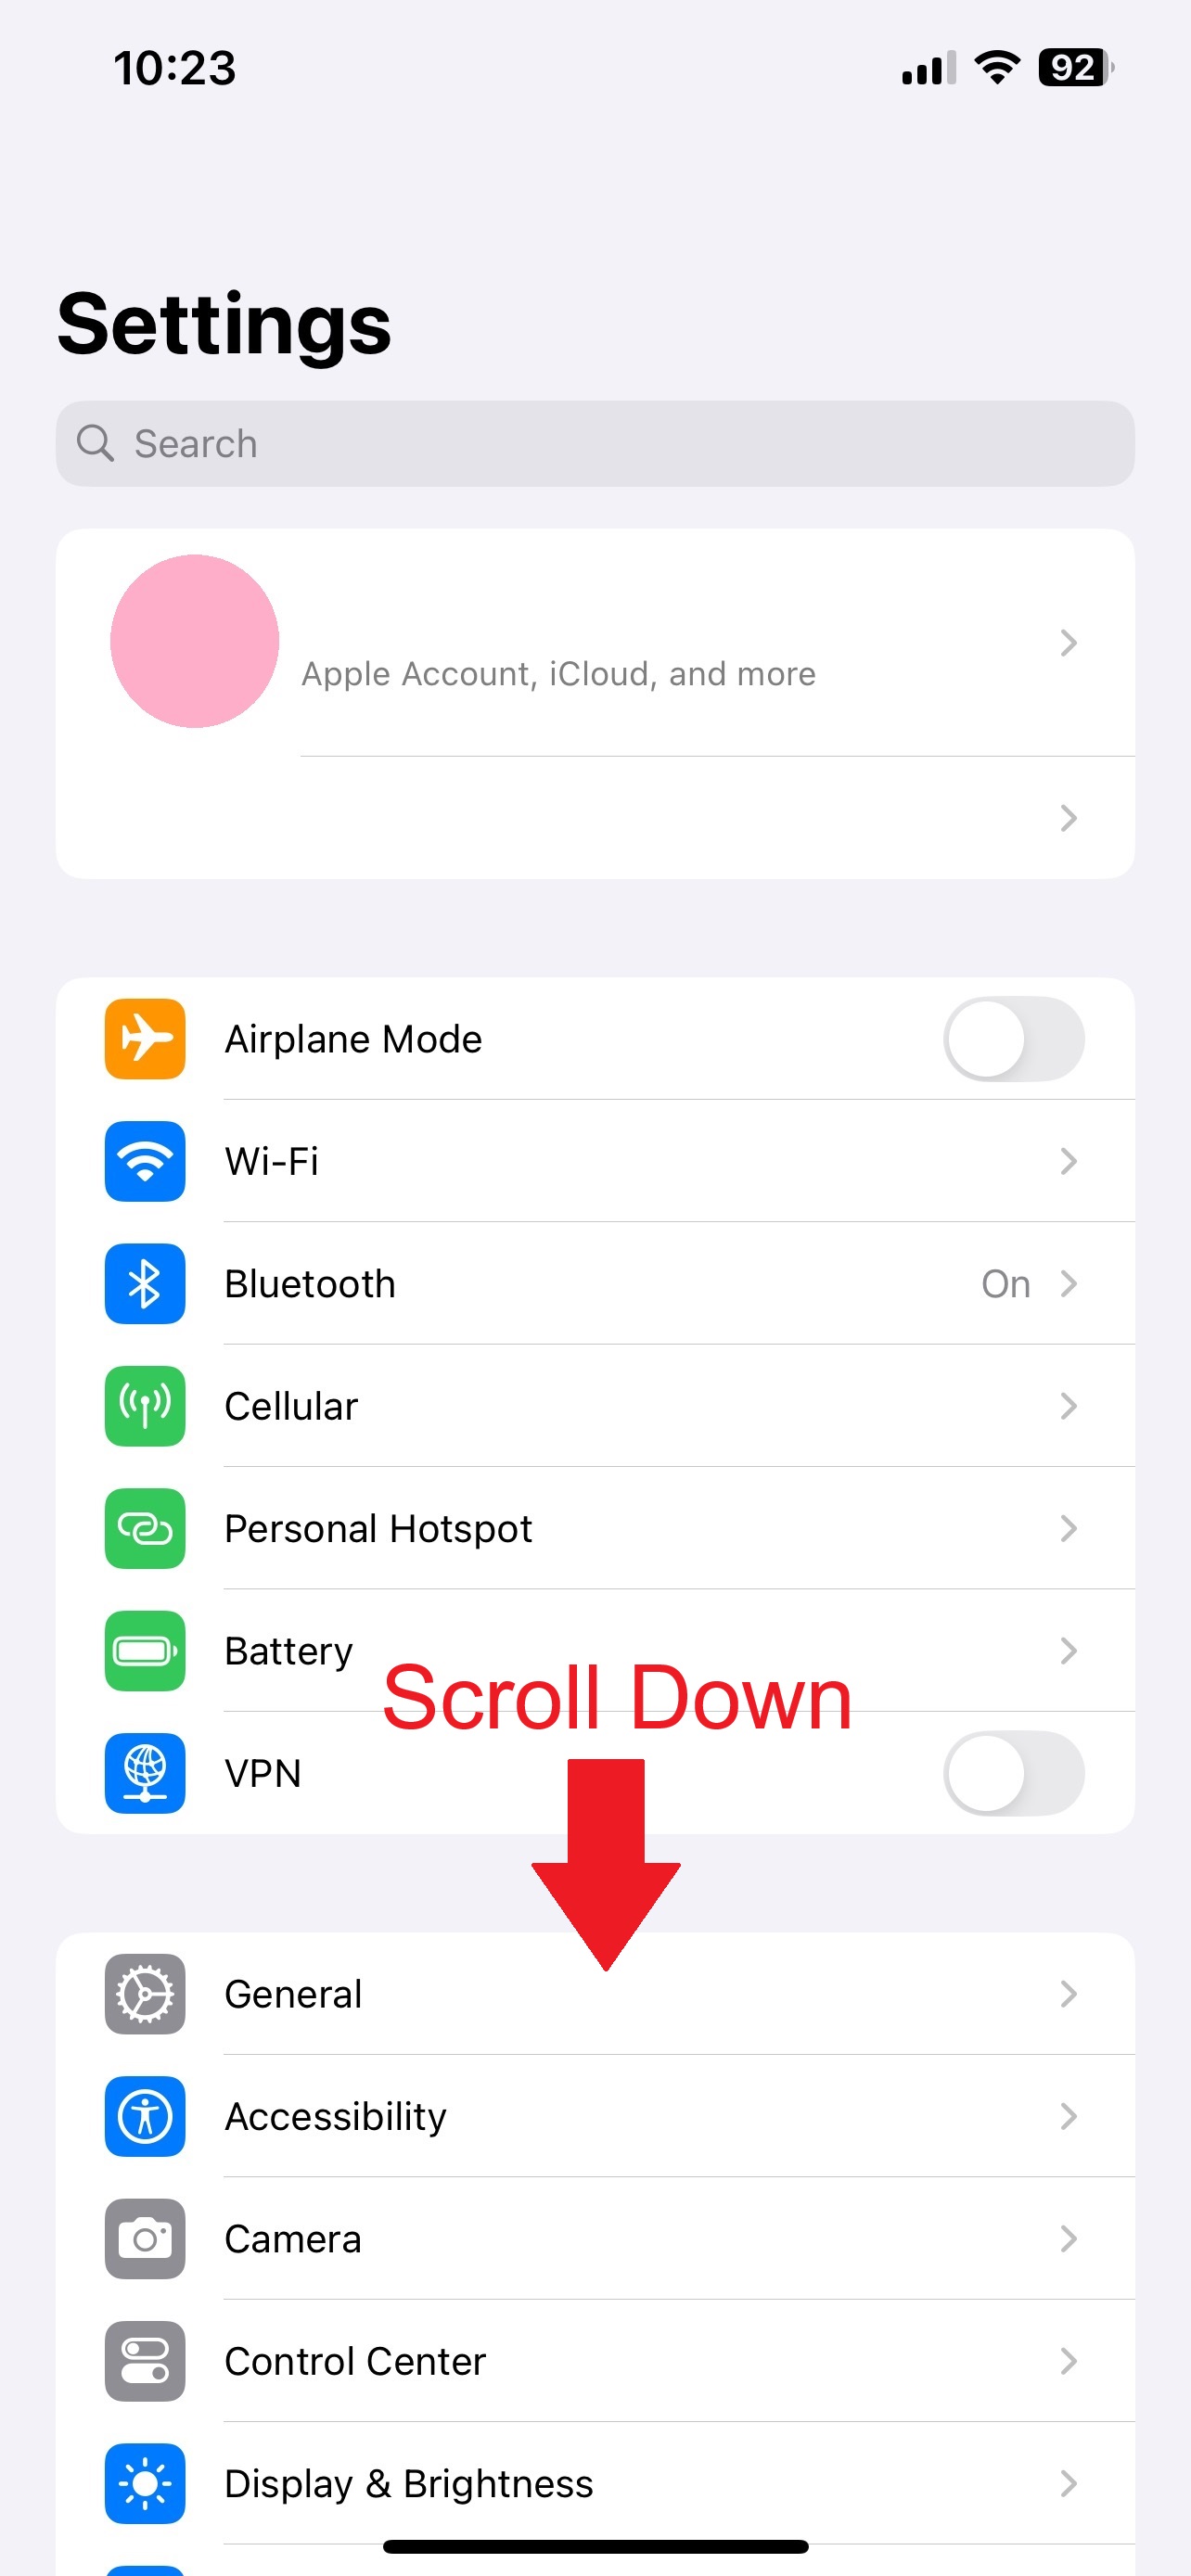
- Access the Settings app of your device

- With the Settings app open, scroll down and tap on “Apps”.
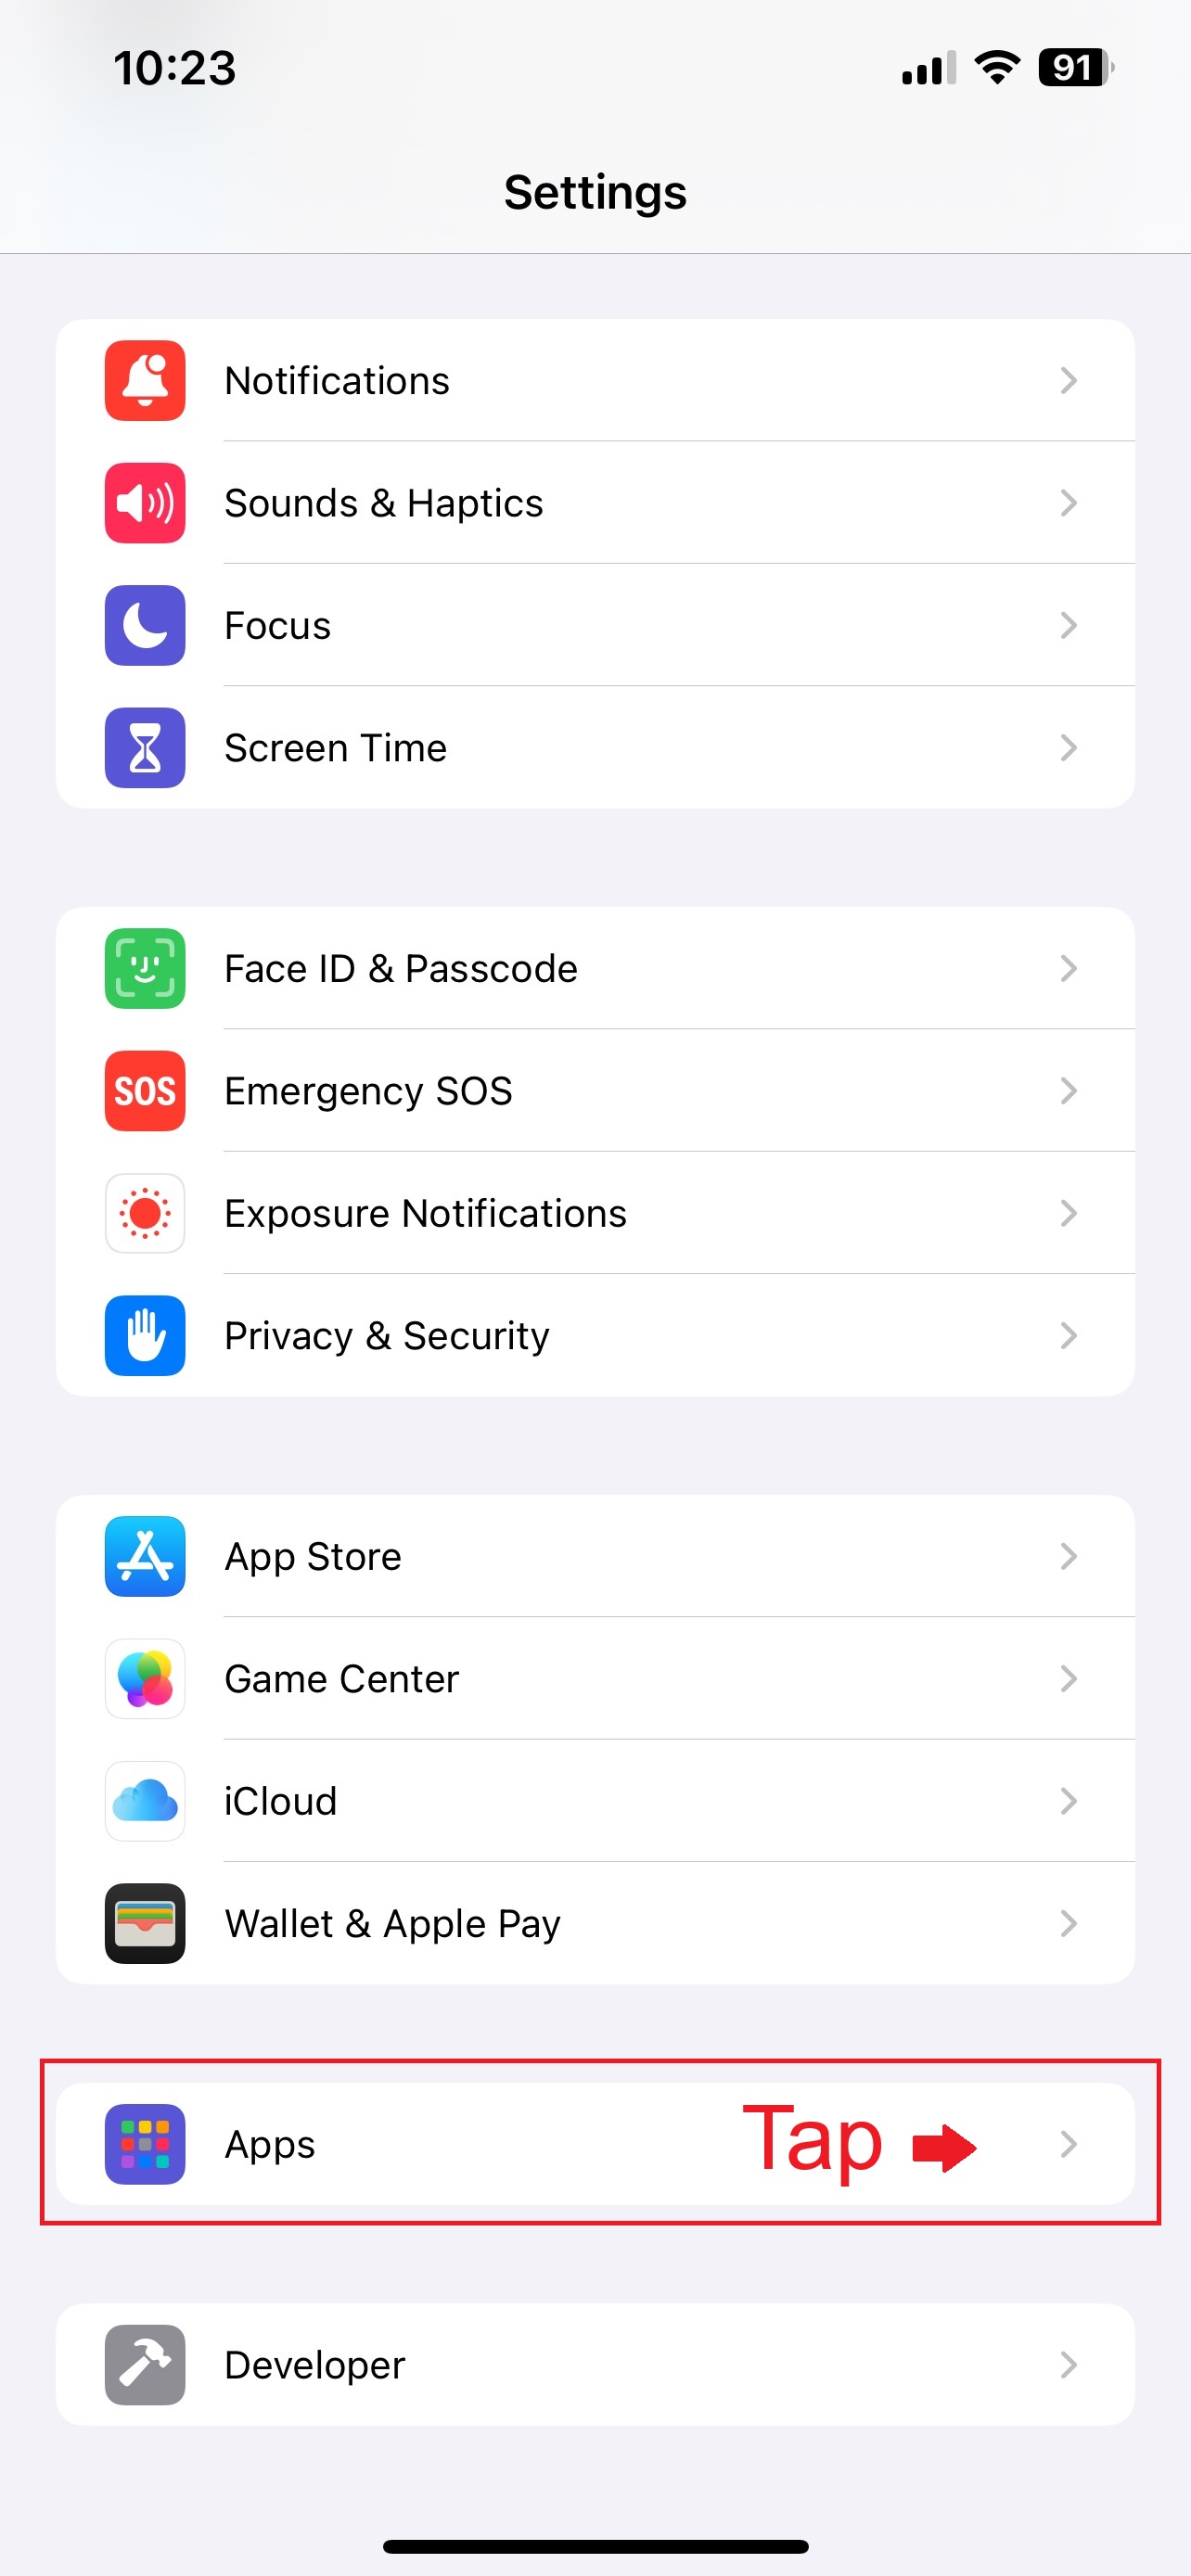
- Select the Mail app settings.
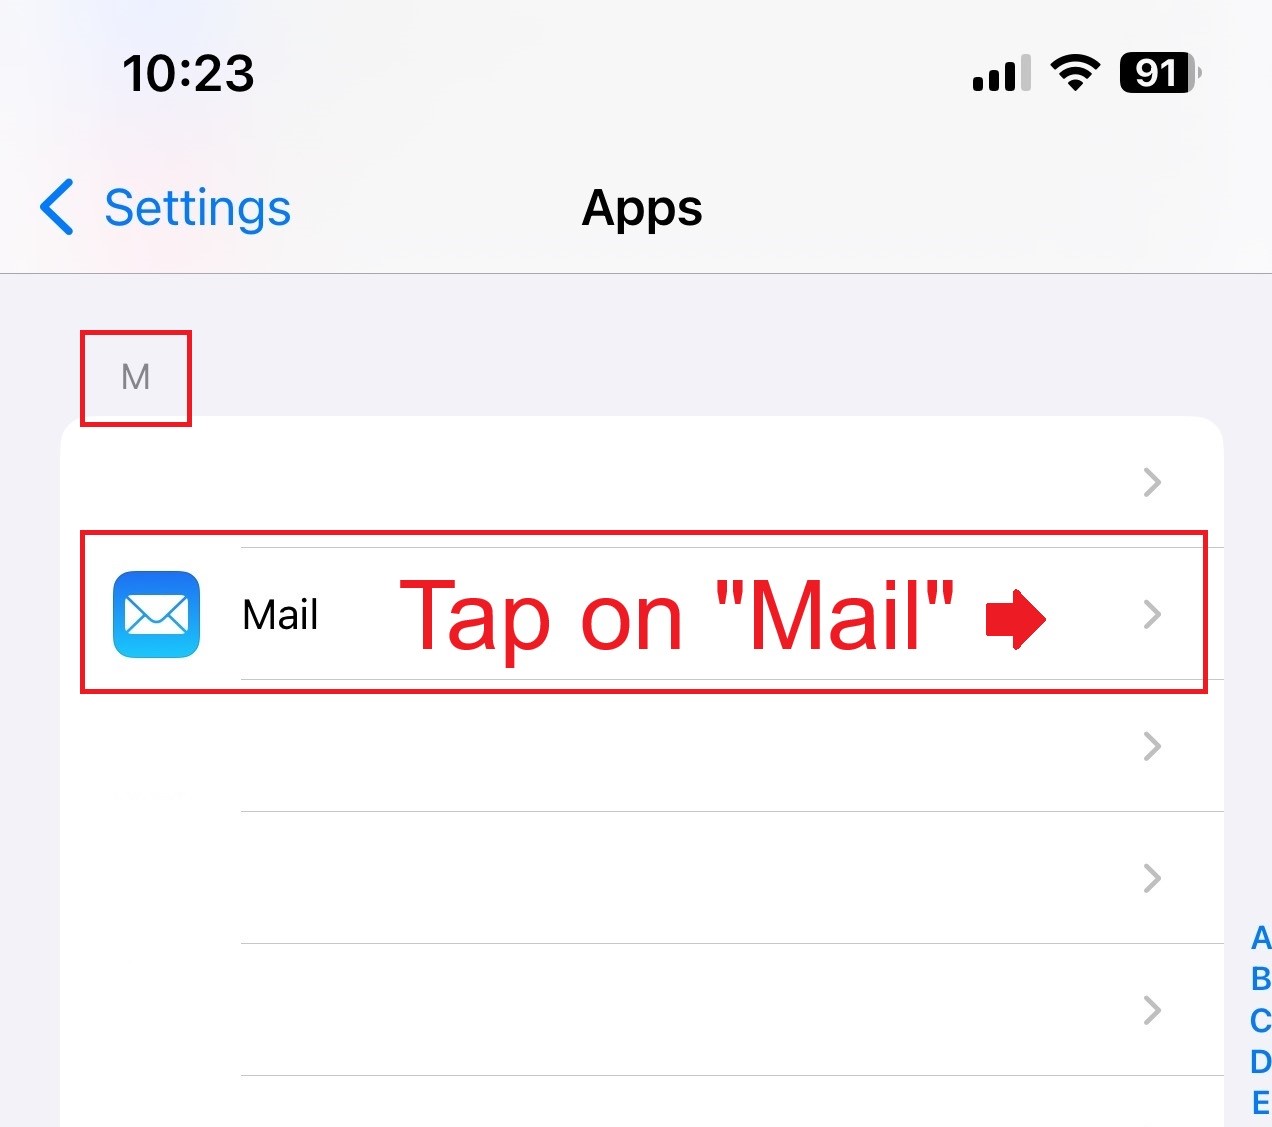
- Then, tap on Mail Accounts.
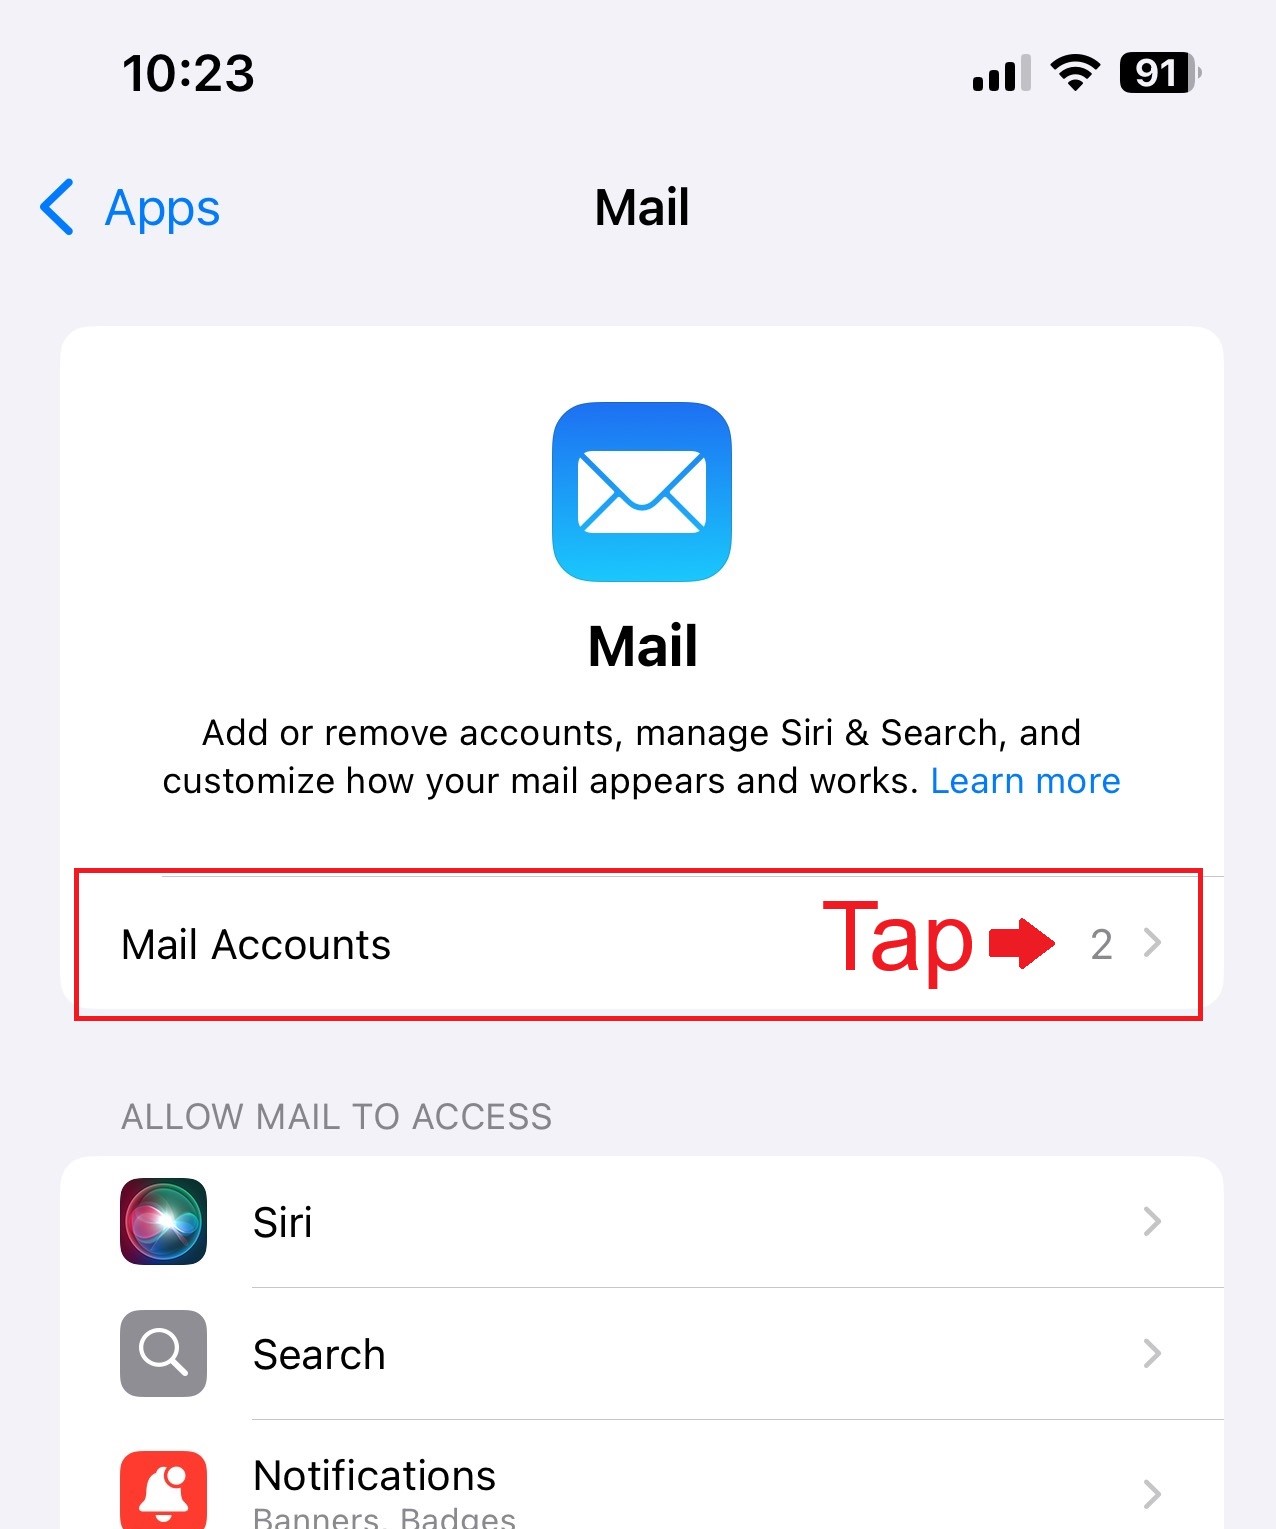
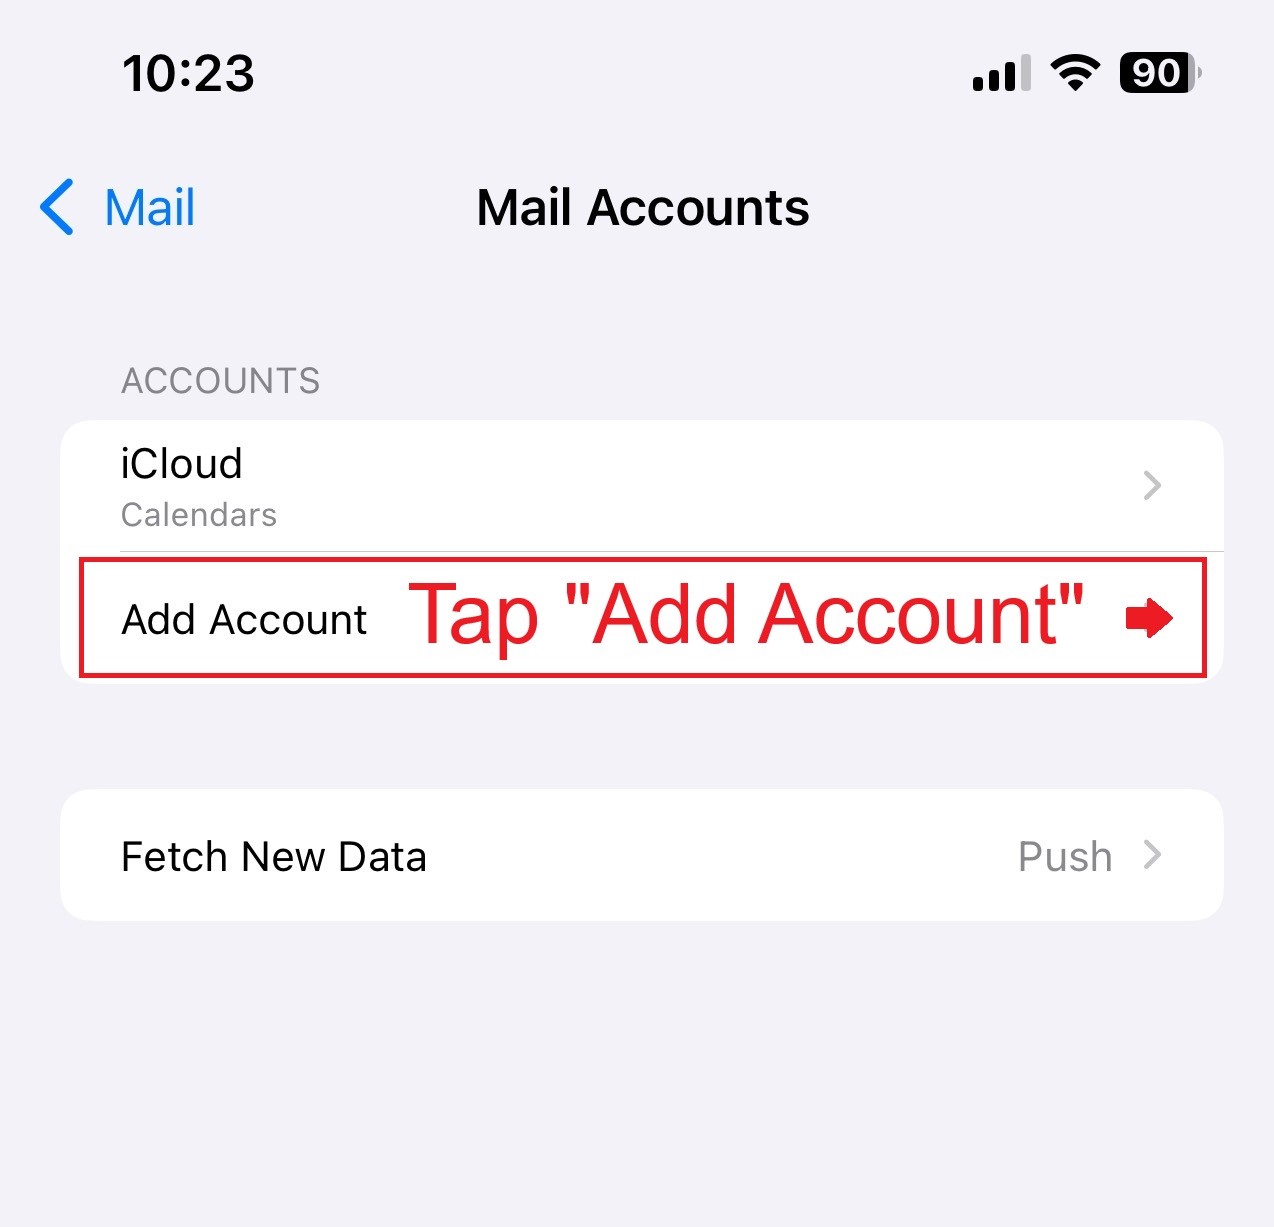
- Next, tap Add Account.
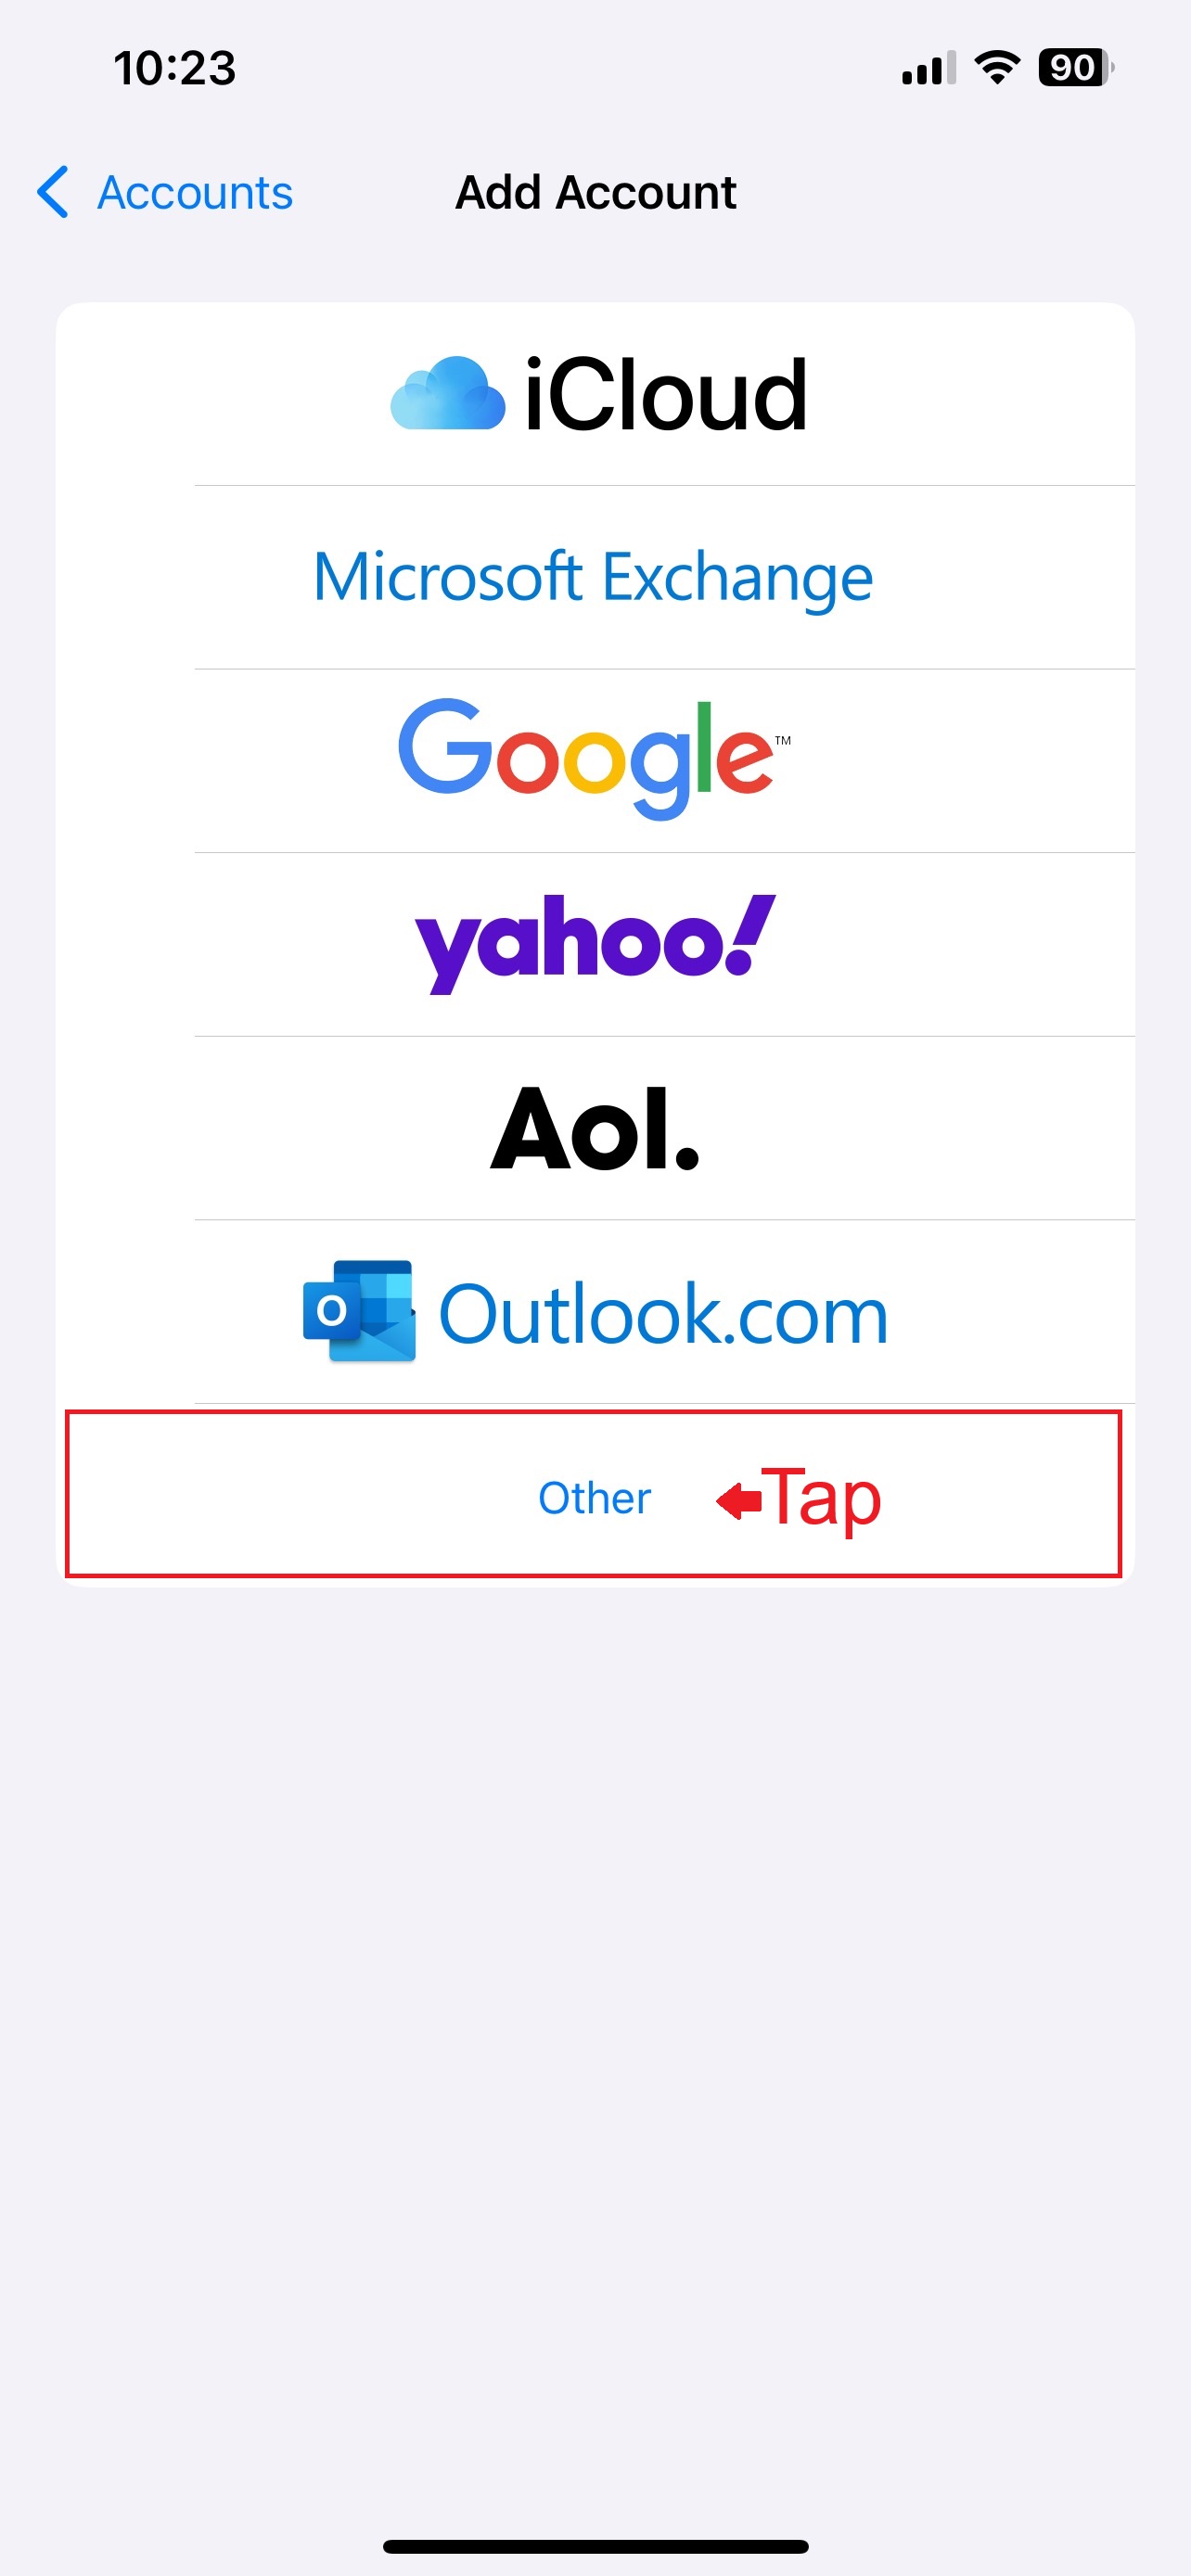
- Then tap on Other.
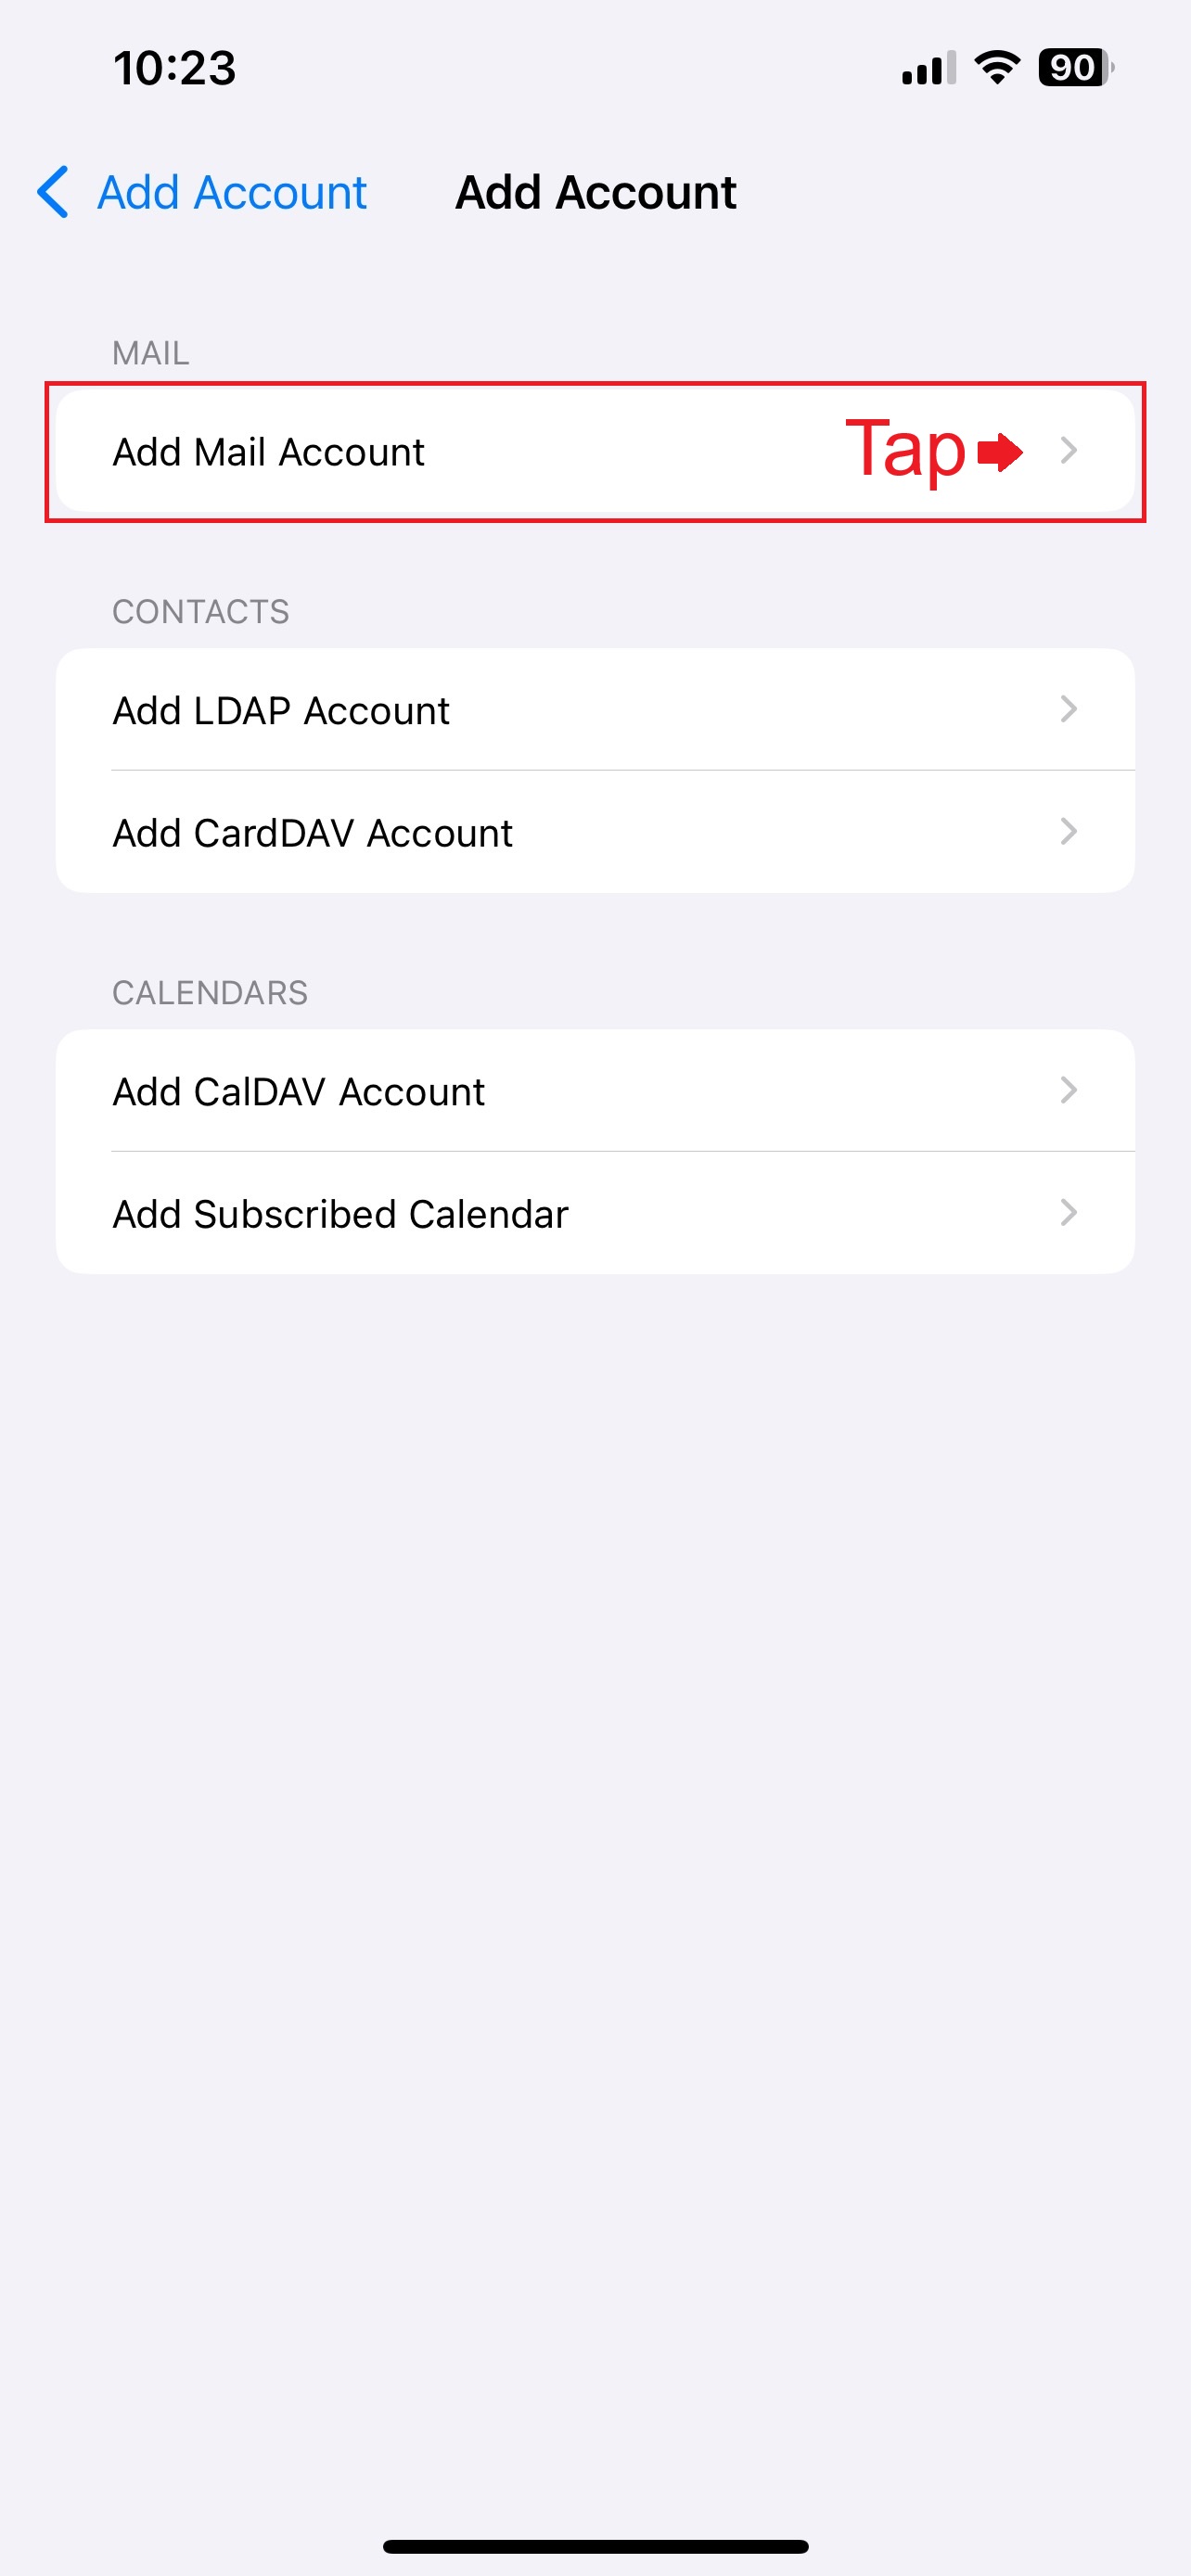
- Then tap on Add Mail Account.
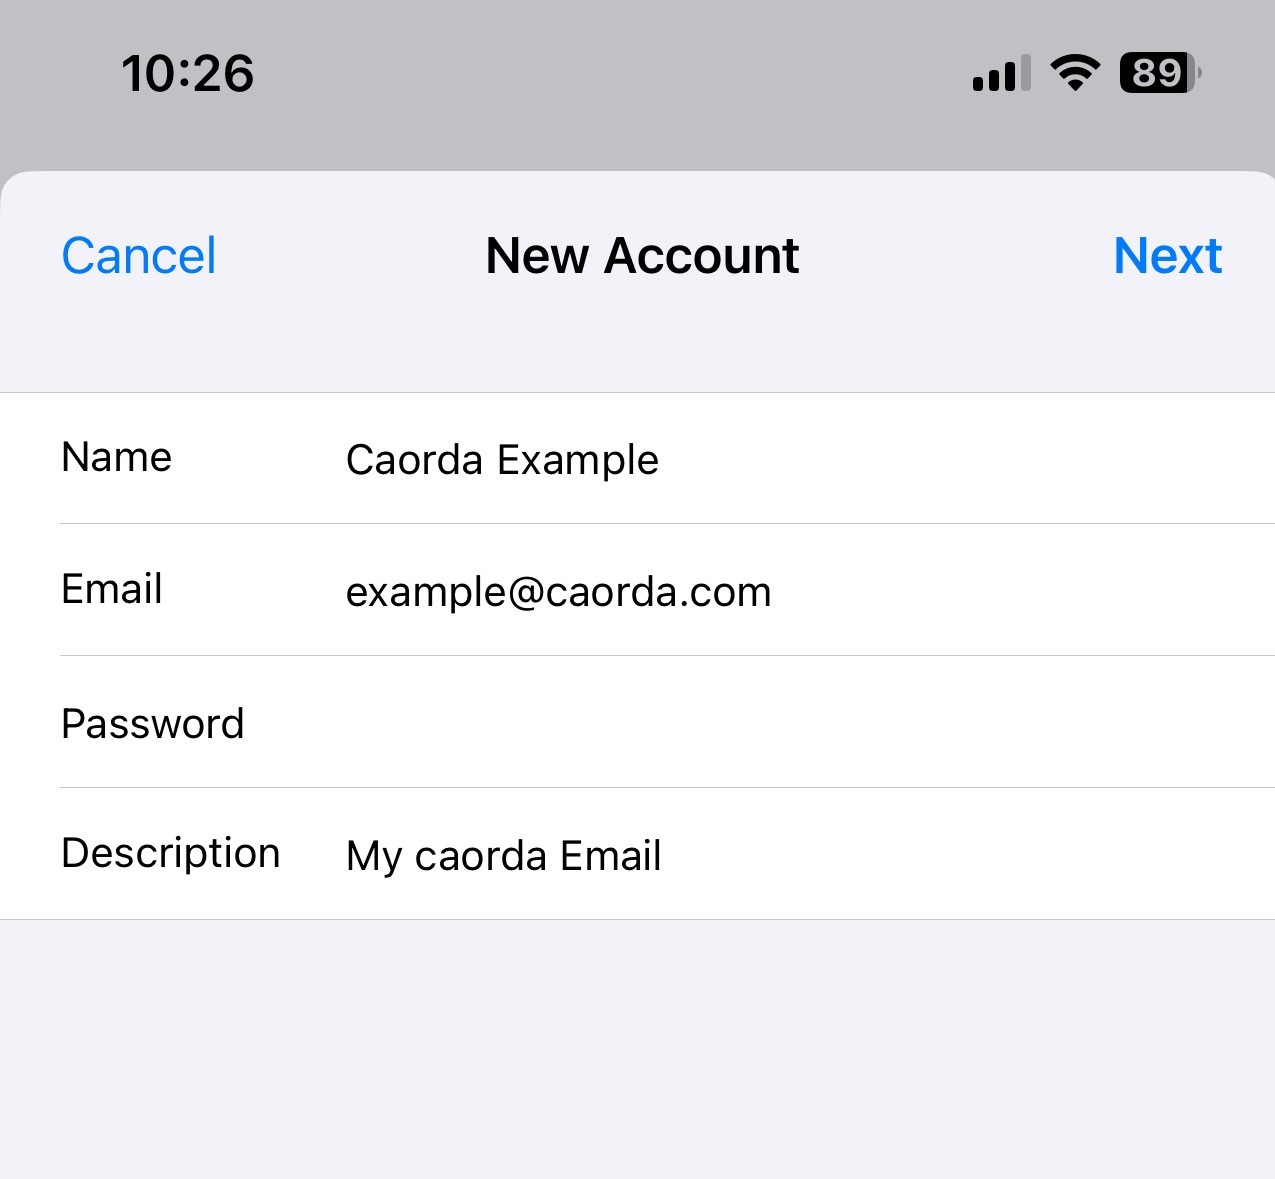
- Next, will be presented with a form to input the initial settings for this new Email Account.
- Enter your Name in the Name field, the new email address you’re setting up in the Email field, the password for that new email account in Password, and then enter a short description for this account if you’d like in the Description field.
- Once you have your details, Tap on Next in the top right corner.
- Enter your Name in the Name field, the new email address you’re setting up in the Email field, the password for that new email account in Password, and then enter a short description for this account if you’d like in the Description field.
- After tapping on Next, you will be presented with more fields.
These are the additional details for this new mail account and you will have to fill out each of these with details as follows.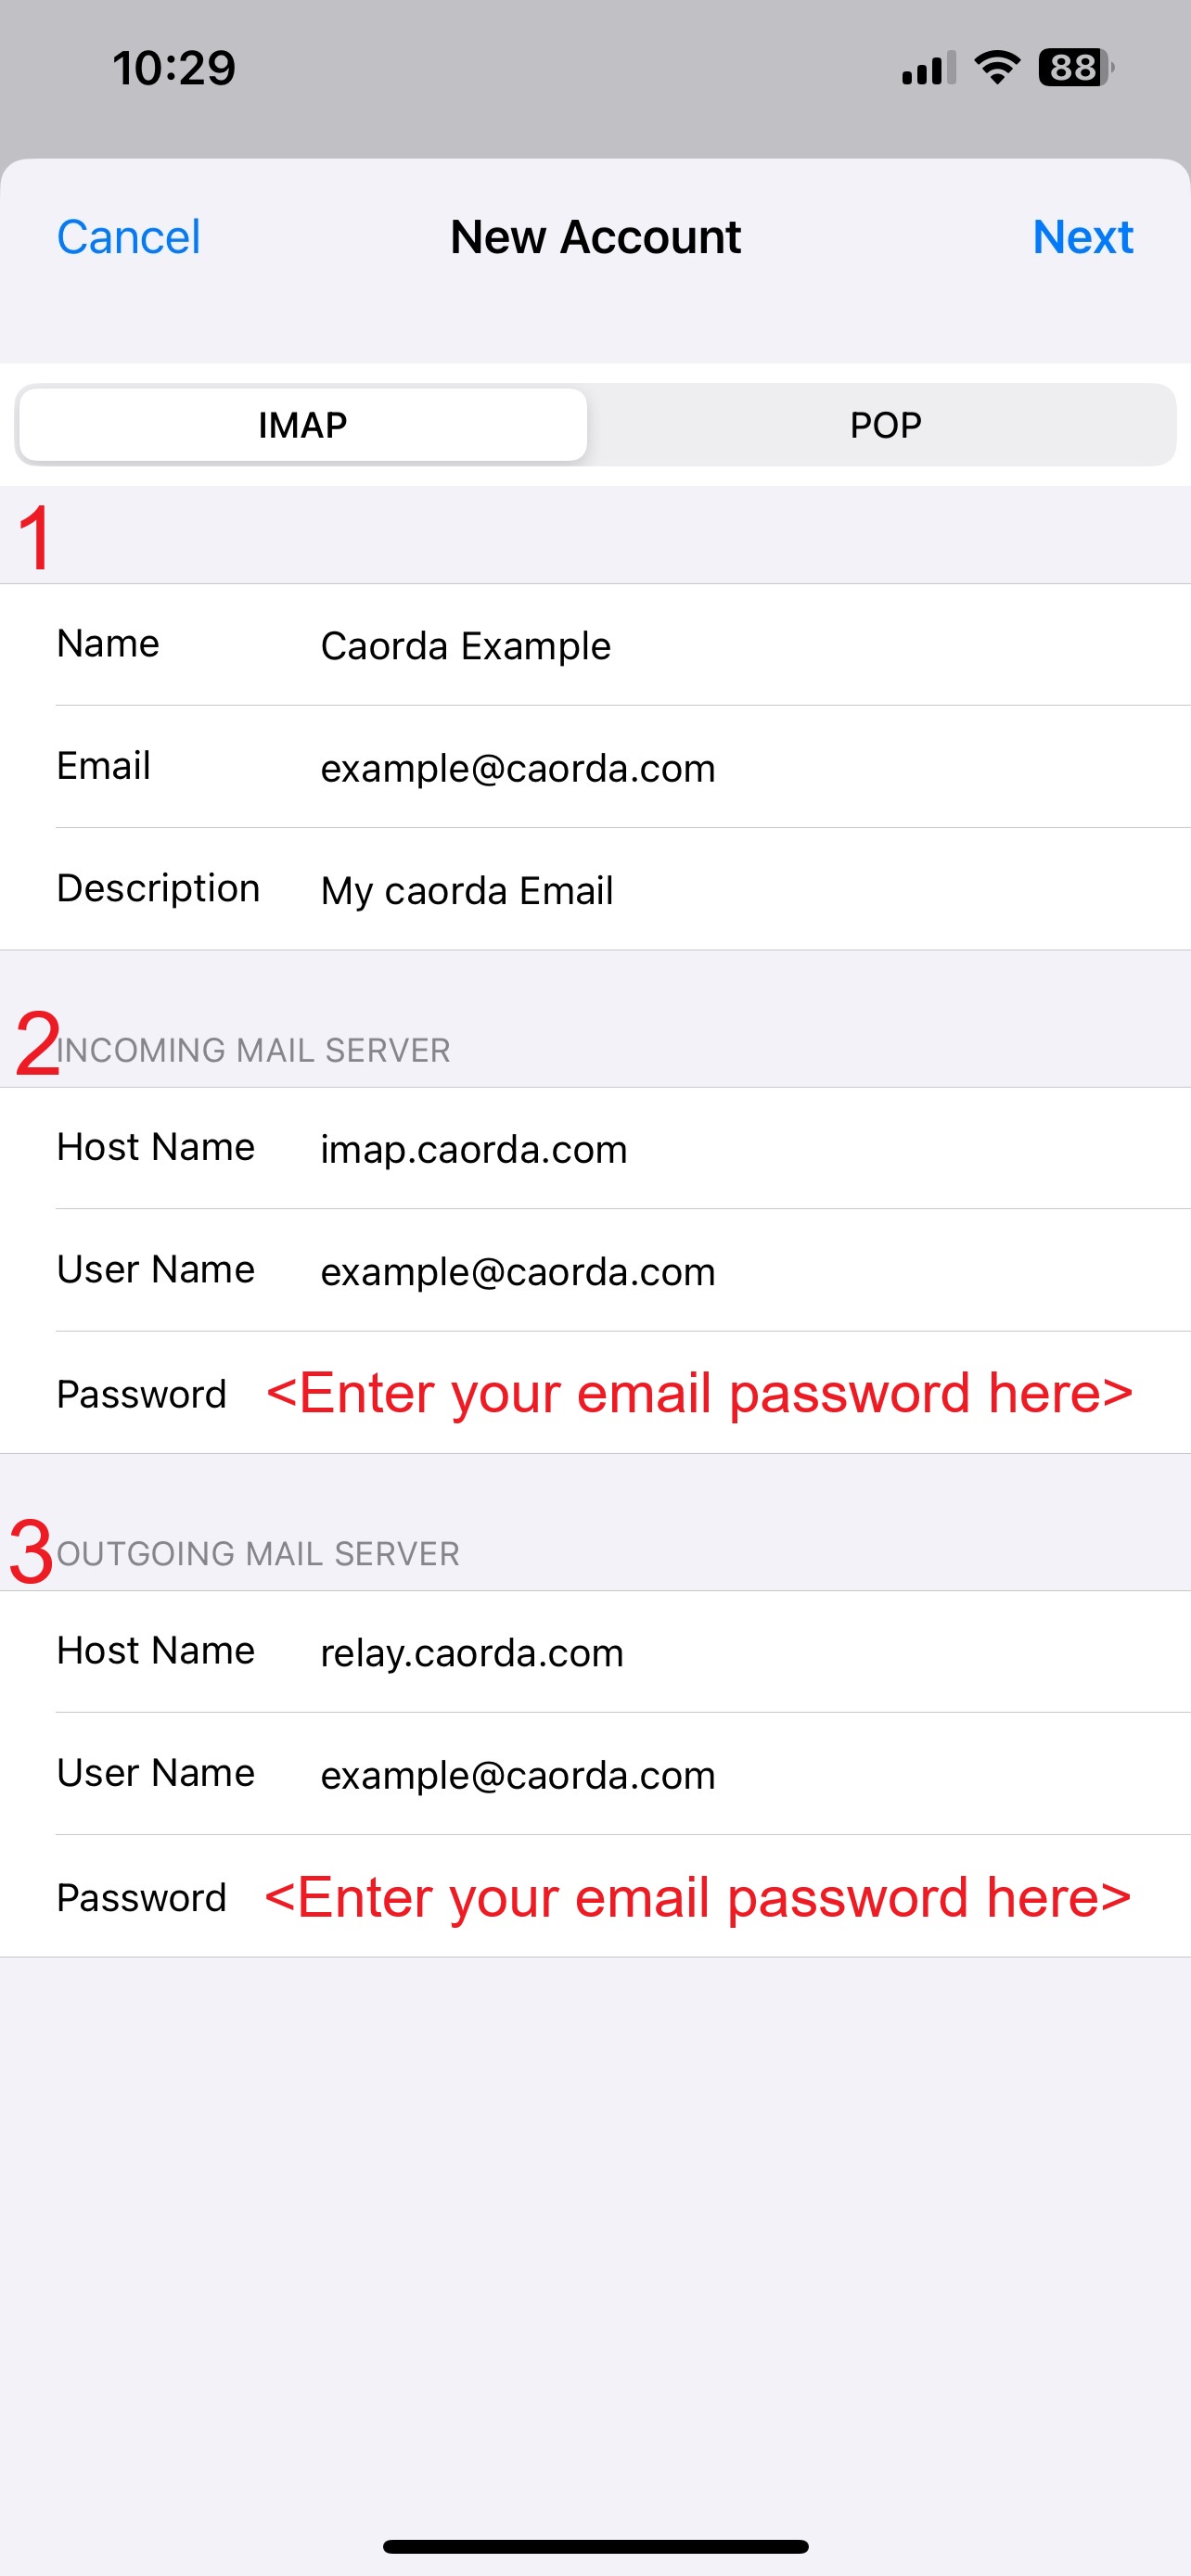
- 1)
- Name – This will auto-populate from the name field on the previous display
- Email – The new email address will auto-populate from the previous display
- Description – the short description from the previous screen
- 2)
- Incoming Mail Server
- Host Name – Enter imap.caorda.com
- User Name – The full email address you are setting up
- Password – The password for this new email account
- 3)
- Outgoing Mail Server
- Host Name – Enter relay.caorda.com
- User Name – The full email address you are setting up
- Password – The password for this new email account
Both Incoming and Outgoing sections must be filled out.
- 1)
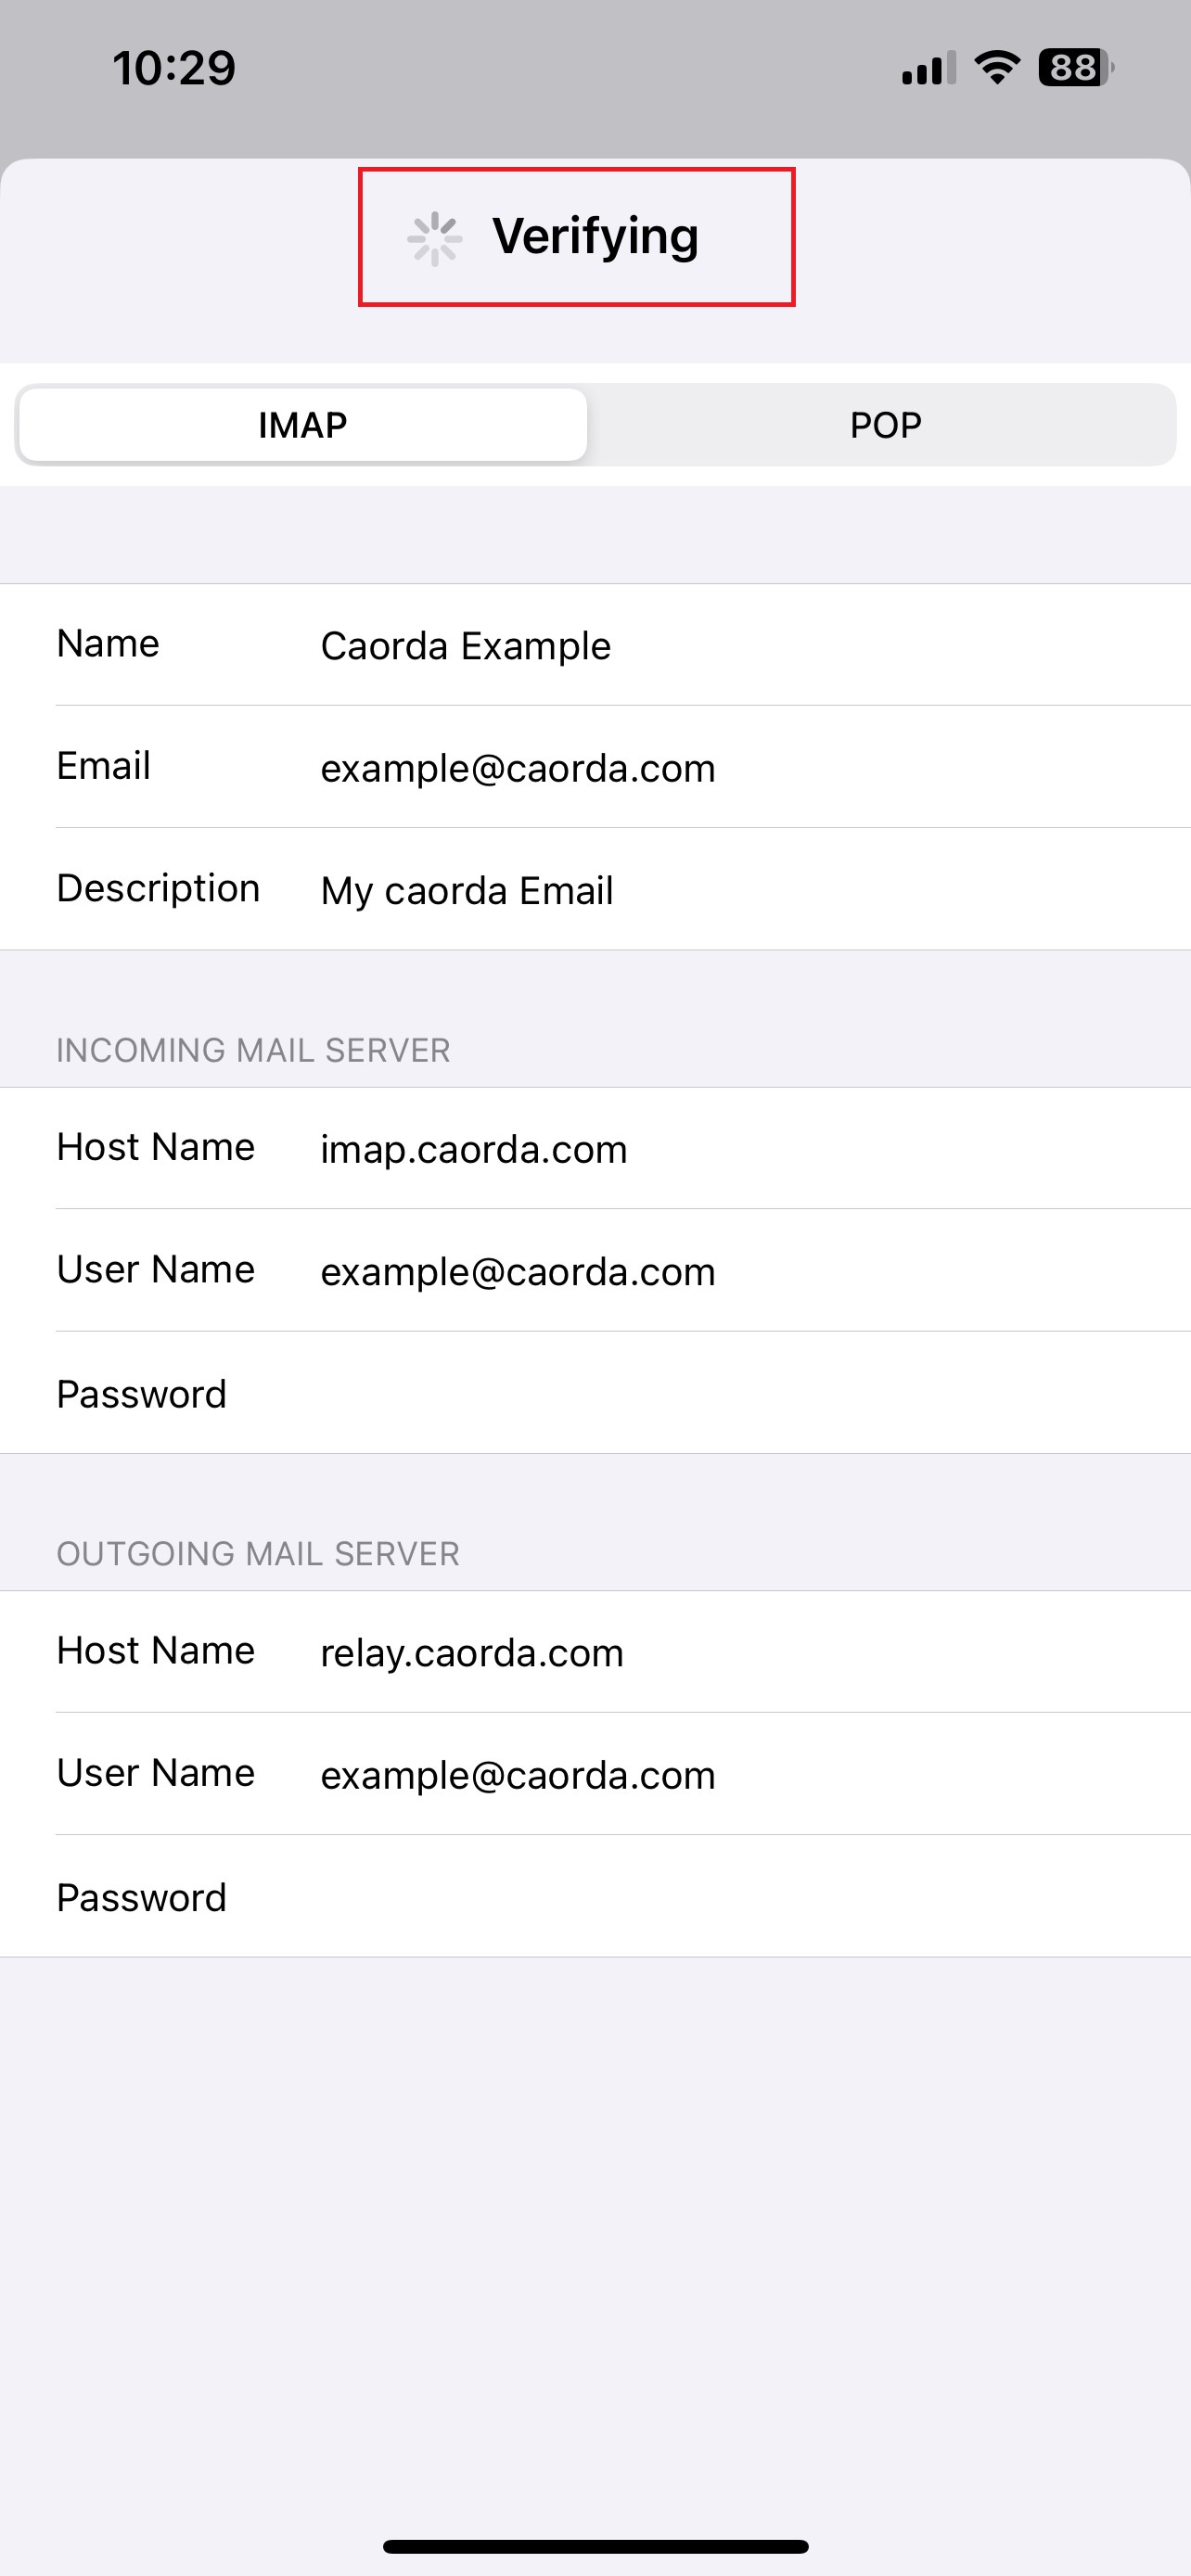
- After tapping on Next when you’ve entered your details you will see a spinning wheel with ‘Verifying’ at the top of your screen.
Let this run and it will bring you to the next screen once the details you have entered have been verified.
- Upon completion of the verification you will be presented with two toggles to select if you want to store notes on the mail server. Select “Mail”.
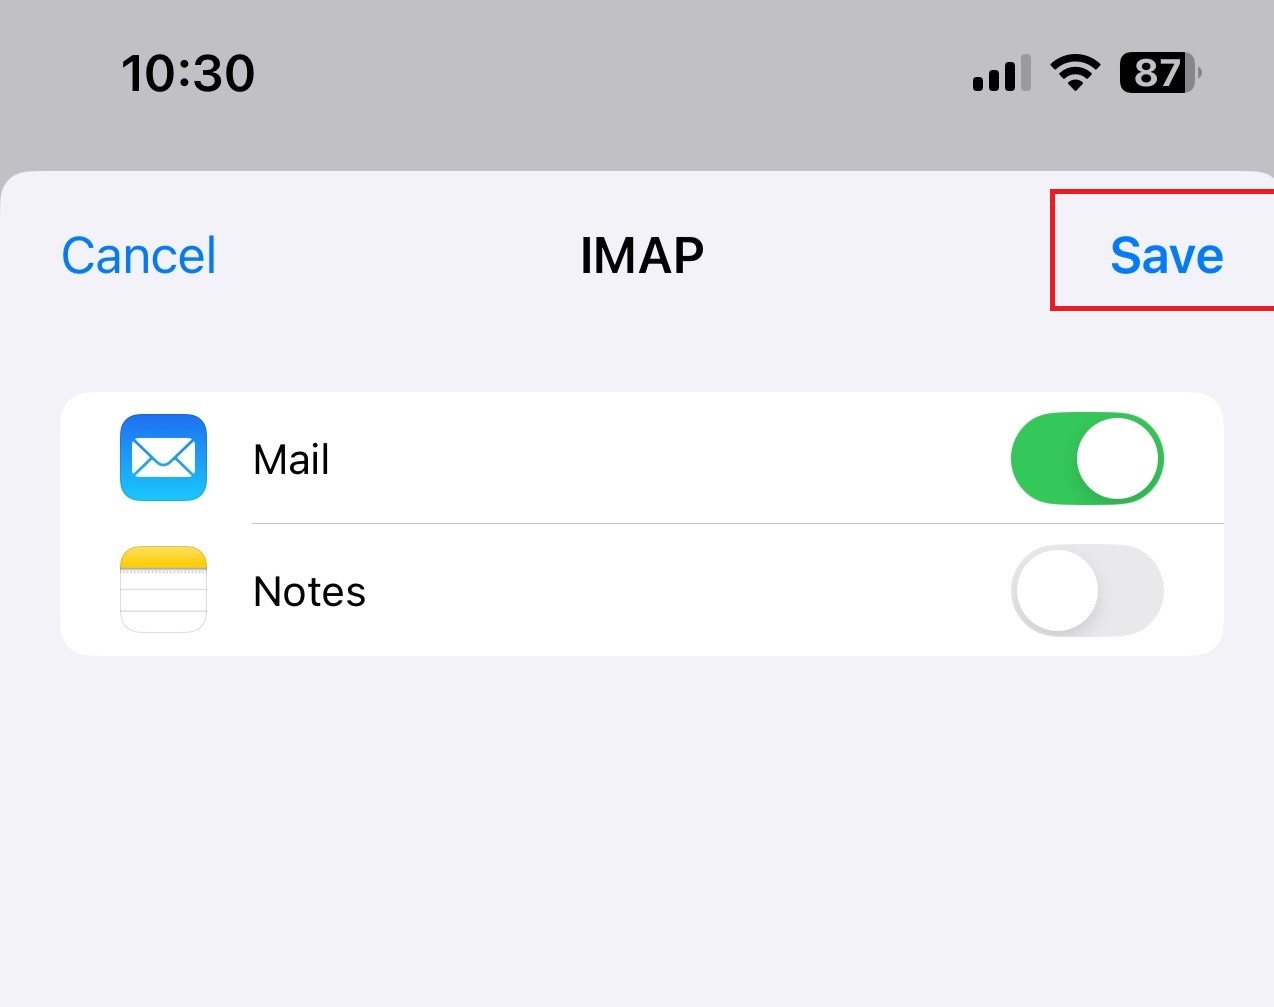
With Mail toggle selected, tap on Save in the top right.
- Now, you can open up your Mail app to see your newly configured Email Address!