The following steps will guide you at setting up your Caorda IMAP account in the Outlook at on your iOS device.
This guide was created on iOS 16.6.1 with the latest Outlook app version at the time (last updated Sept 8th, 2023), newer or older devices or an updated Outlook app may not show the same windows. Feel free to reach out to Caorda Support for any help.
- If this is the first time you are installing and setting up Outlook you will be prompted to add an account once you open the Outlook App. You can proceed to step #2 if this is your first time setup.
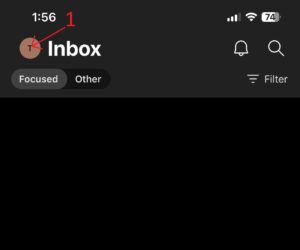
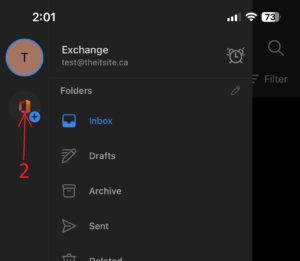
If you already have an account in the Outlook app and would like to add an additional account you can do so by opening the sidebar by tapping your circle profile picture(1) in the top left to open the sidebar menu, then Tap on the Plus icon on the left.


- Start adding a new account by entering in the email address. Then Tap Add Account.

- When prompted to enter the password, select Not Exchange in the top right corner.

- Select Change Account Provider.

- Select IMAP from the list of providers.

- Enter the IMAP server details as follows:
Email Address: Your full email address <example@caorda.com>
Display Name: Your Name
Description: A description for this inbox. You can leave this empty.IMAP Incoming Mail Server
IMAP Hostname: imap.caorda.com
IMAP Port: 993
Port Security: SSLIMAP Username: Your full email address <example@caorda.com>
IMAP Password: The password for your email address.SMTP Outgoing Mail Server
SMTP Hostname: relay.caorda.com
SMTP Port: 587
Port Security: STARTTLSSMTP Username: Your full Email address <example@caorda.com>
SMTP Password: The password for your email address.

After entering in the details you can select Sign In.
- The next three screens will ask for your consent to collect data. You can select which options suit your needs.


- After finishing with the data collection questions you will now see your Inbox. Your Caorda Email is now set up.
