The following steps can be applied from Outlook 2010 to 2016 for Windows, for Mac instruction you can find them here. Please read all the steps before trying to set this up.
- Close Outlook if you currently have it open.
- Open up Control Panel
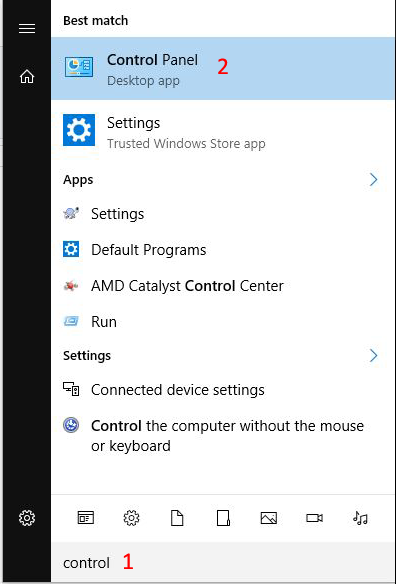
- Click on the Windows icon

- Type in Control(1) in the search bar at the bottom and click on Control Panel(2)
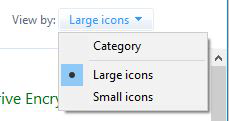
- In the upper right side of the Control Panel select either Small Icons or Large Icons from the View By: option
- Double Click on the Mail icon

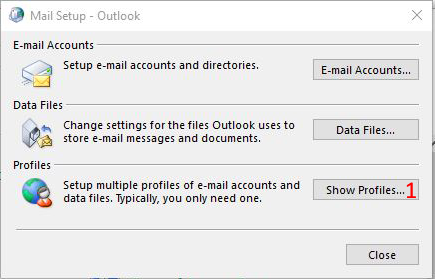
- The Mail Setup – Outlook window will pop up, click on Show Profiles… (1)
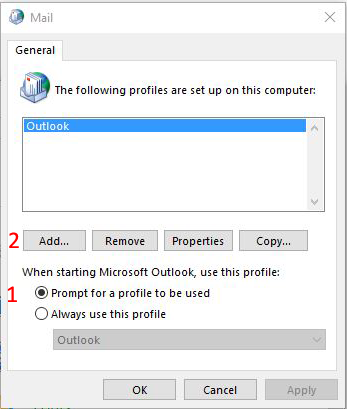
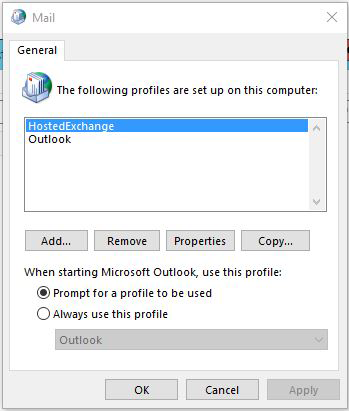
- You will want to setup a new profile, this is to keep any old settings/accounts. First click on Prompt for a profile to be used (1.) then Click on Add.. (2)
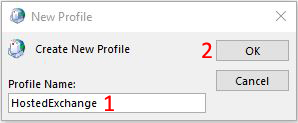
*** You can use your existing profile if you so choose, however you may encounter some conflicts with your other accounts. - Enter a name for the new profile (1) and click on OK (2)
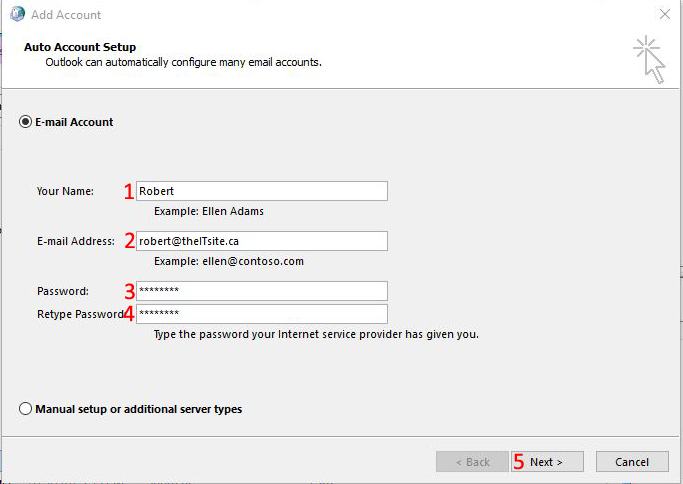
- You will now be prompted to auto configure the account, at this section you simply need to supply your Name(1), Email Address(2) and Password twice(3-4). Once filled out click on Next(5)
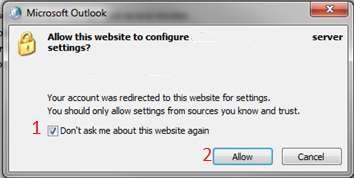
- The first time you setup the account you will be prompted to allow hostedexchange.caorda.com to supply configuration details. Check mark “Don’t ask me about this website again” and click on Allow
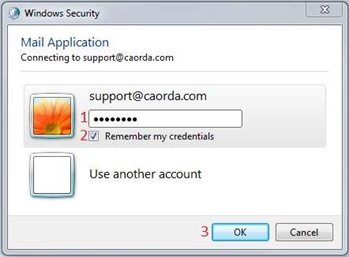
- You will likely also be prompted to Log into the server, if required enter your full email address as your Username, enter your password, check mark Remember my credentials and click on OK
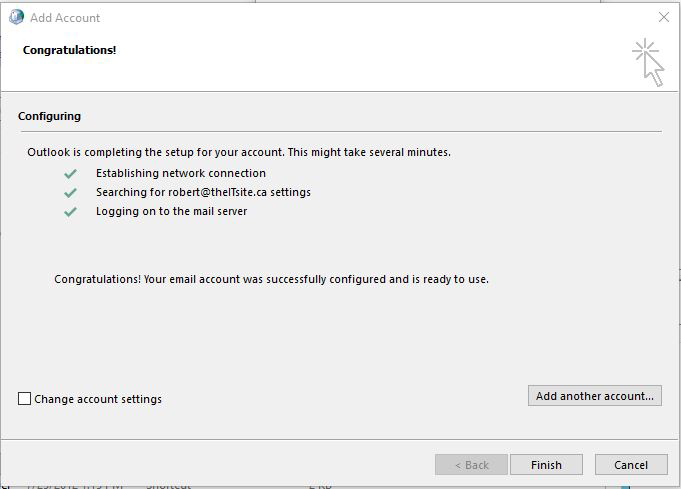
- If all is good, you should see green check marks to all the options, you can now click on Finish
- You can now close the Mail window, click OK
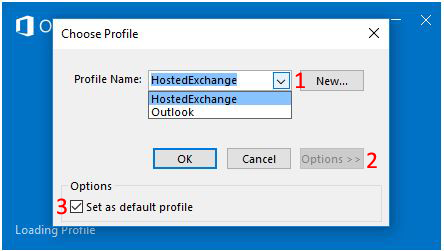
- Fire up Outlook and select the new profile(1), it is also suggested to click on the Options button(2) and select “Set as default profile”(3). This will allow you to go into Outlook faster without having to select a different profile.
- Congratulations you have setup your new Hosted Exchange account
- Click on the Windows icon